In Q4 of last year, GoPro issued a challenge to the media department called the GPOP Challenge, in which each employee was given one HERO4 and 48 hours to create absolutely anything. Inspired by the cinematography in Into The Mind, I built a cheap, revolving-arm rig and planned to shoot a series of scenics around San Francisco. More than anything, I just wanted to experiment with the concept and see what came of it. I learned many lessons during the process that I wanted to share with anyone looking to do the same or is just interested in the process. In the three sections below I outline the building of the rig, camera settings/techniques for getting the shots, and the post-production work in After Effects.
Watch the video here.
Part I The Rig
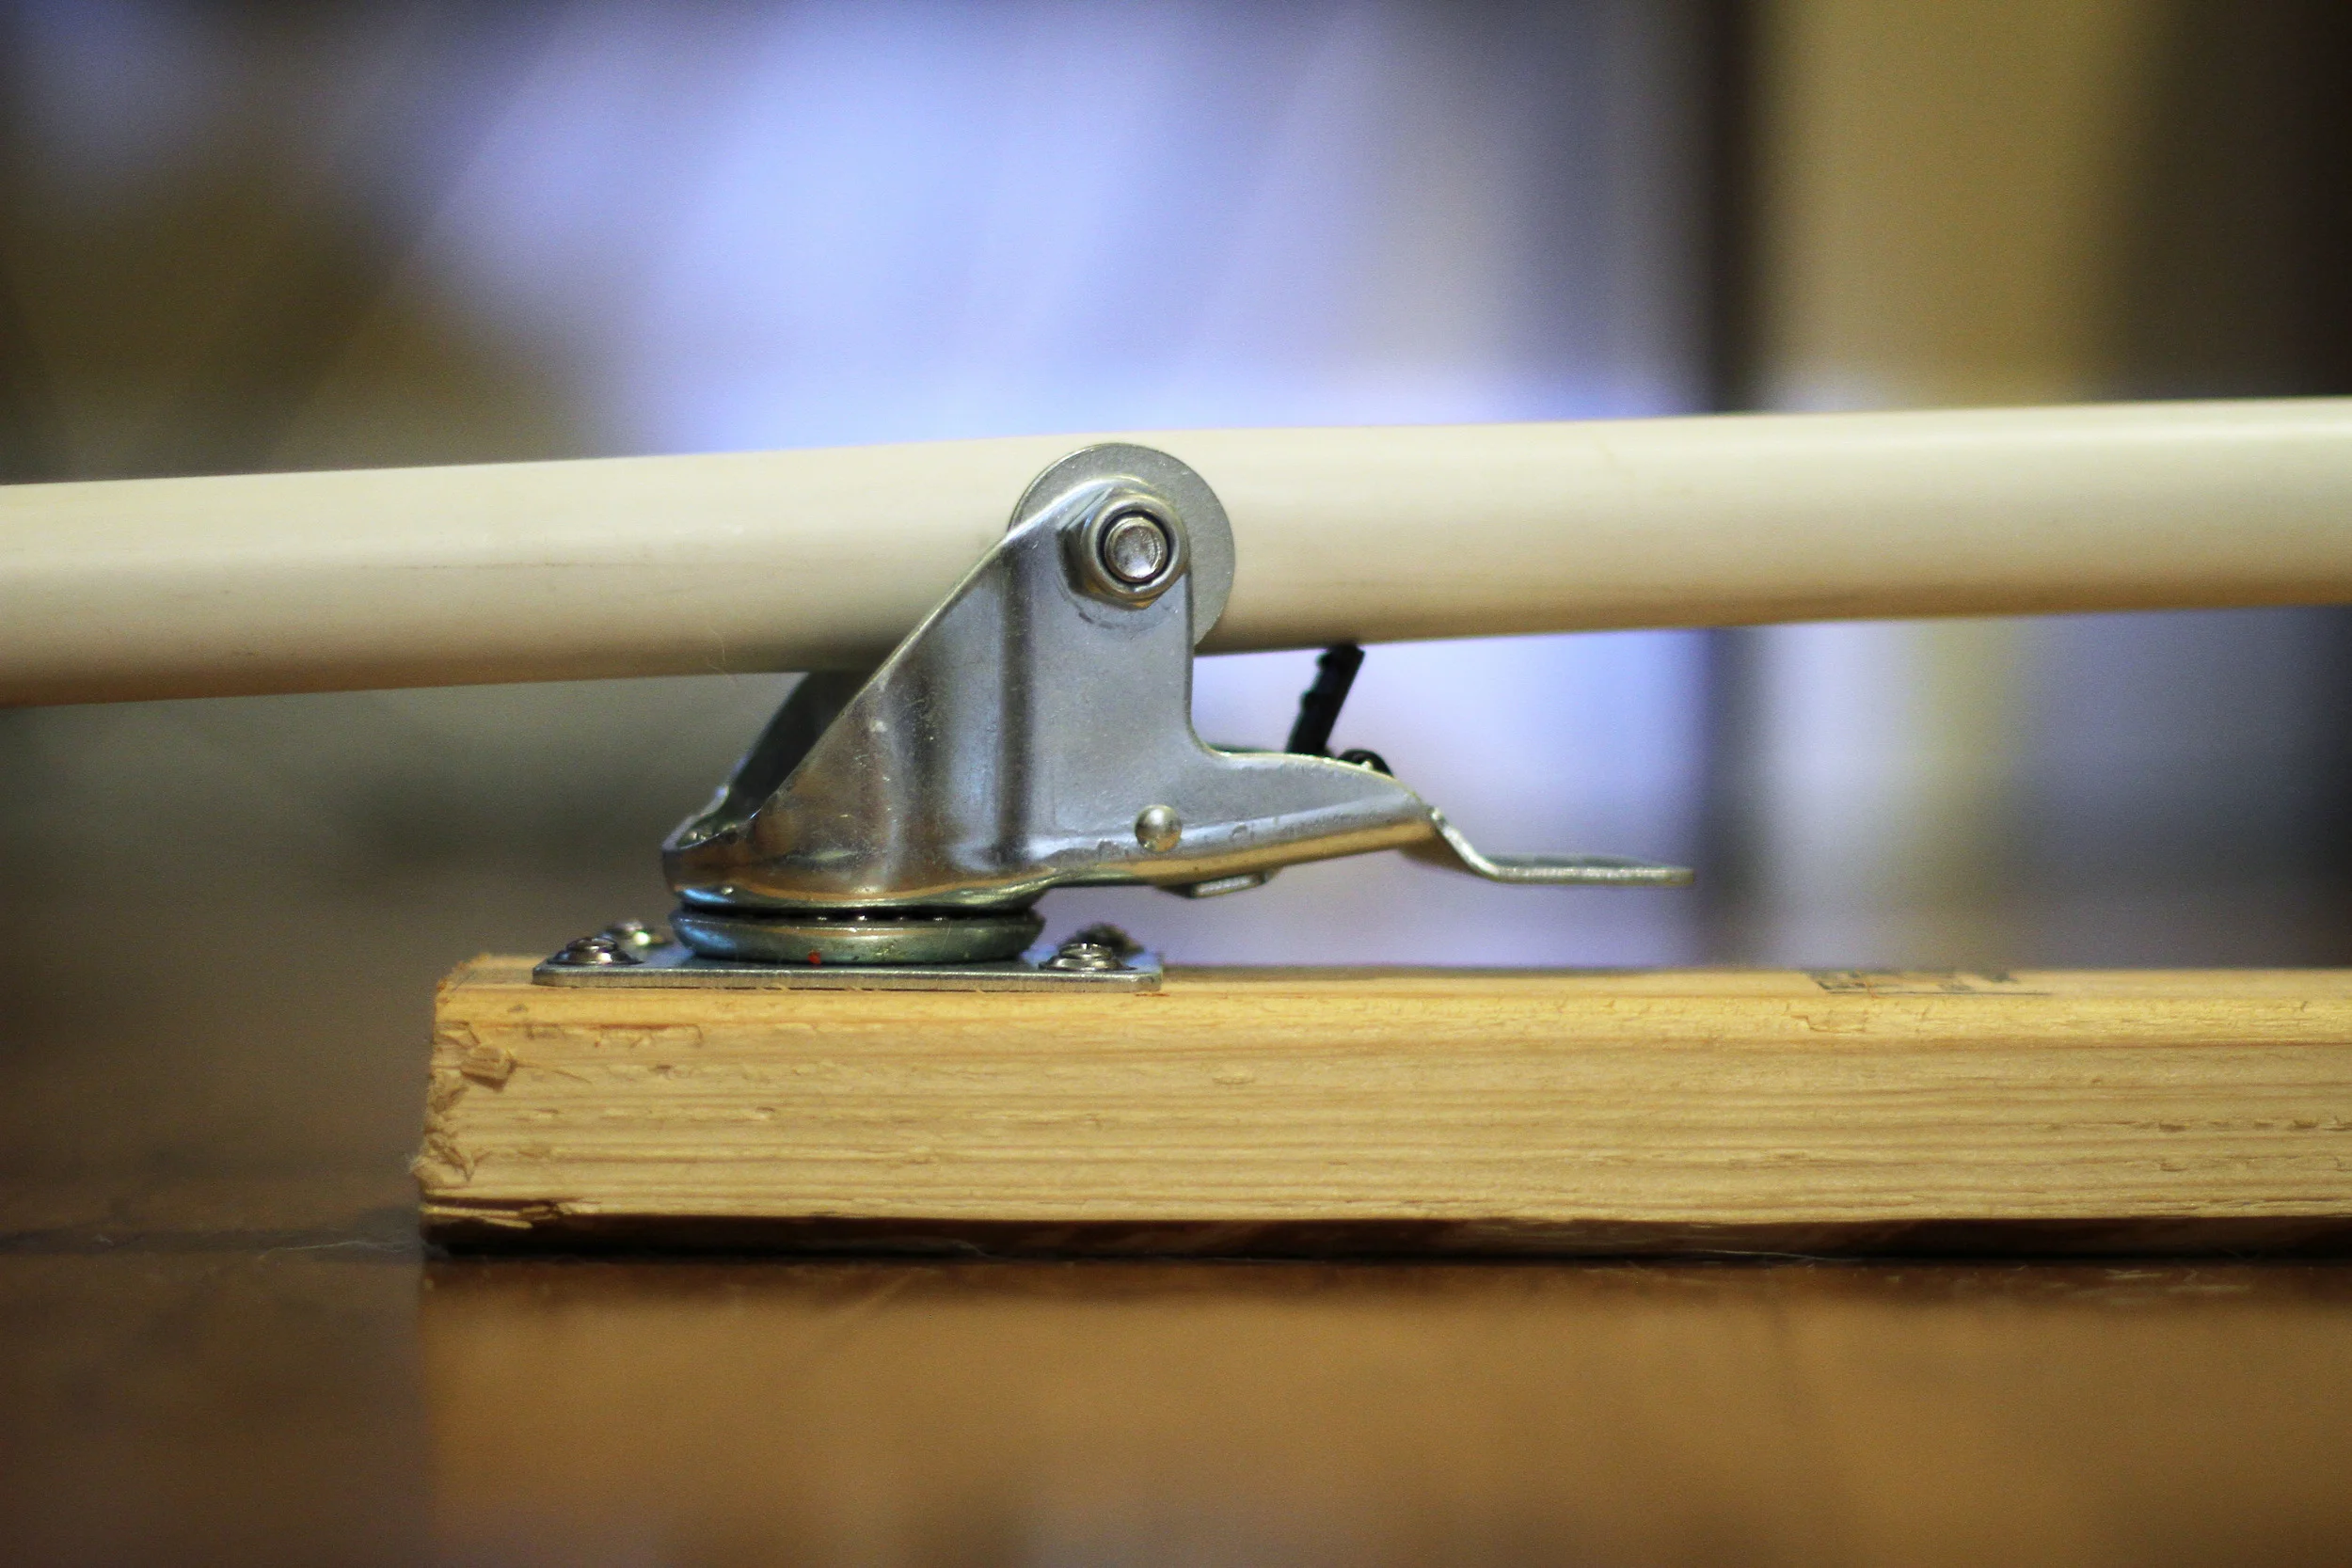
I had two things in mind when building this rig: keeping it as light and compact and possible and spending very little money. I was able to purchase everything I needed from Home Depot for under $25. There were three main parts to the rig: one 2x4, four feet of PVC, and a swivel. For the swivel I used a caster and removed the wheel. I then drilled a hole about a quarter of the way down the PVC to attach it to the caster, which was screwed to the 2x4.
Image 1/3
Image 2/3
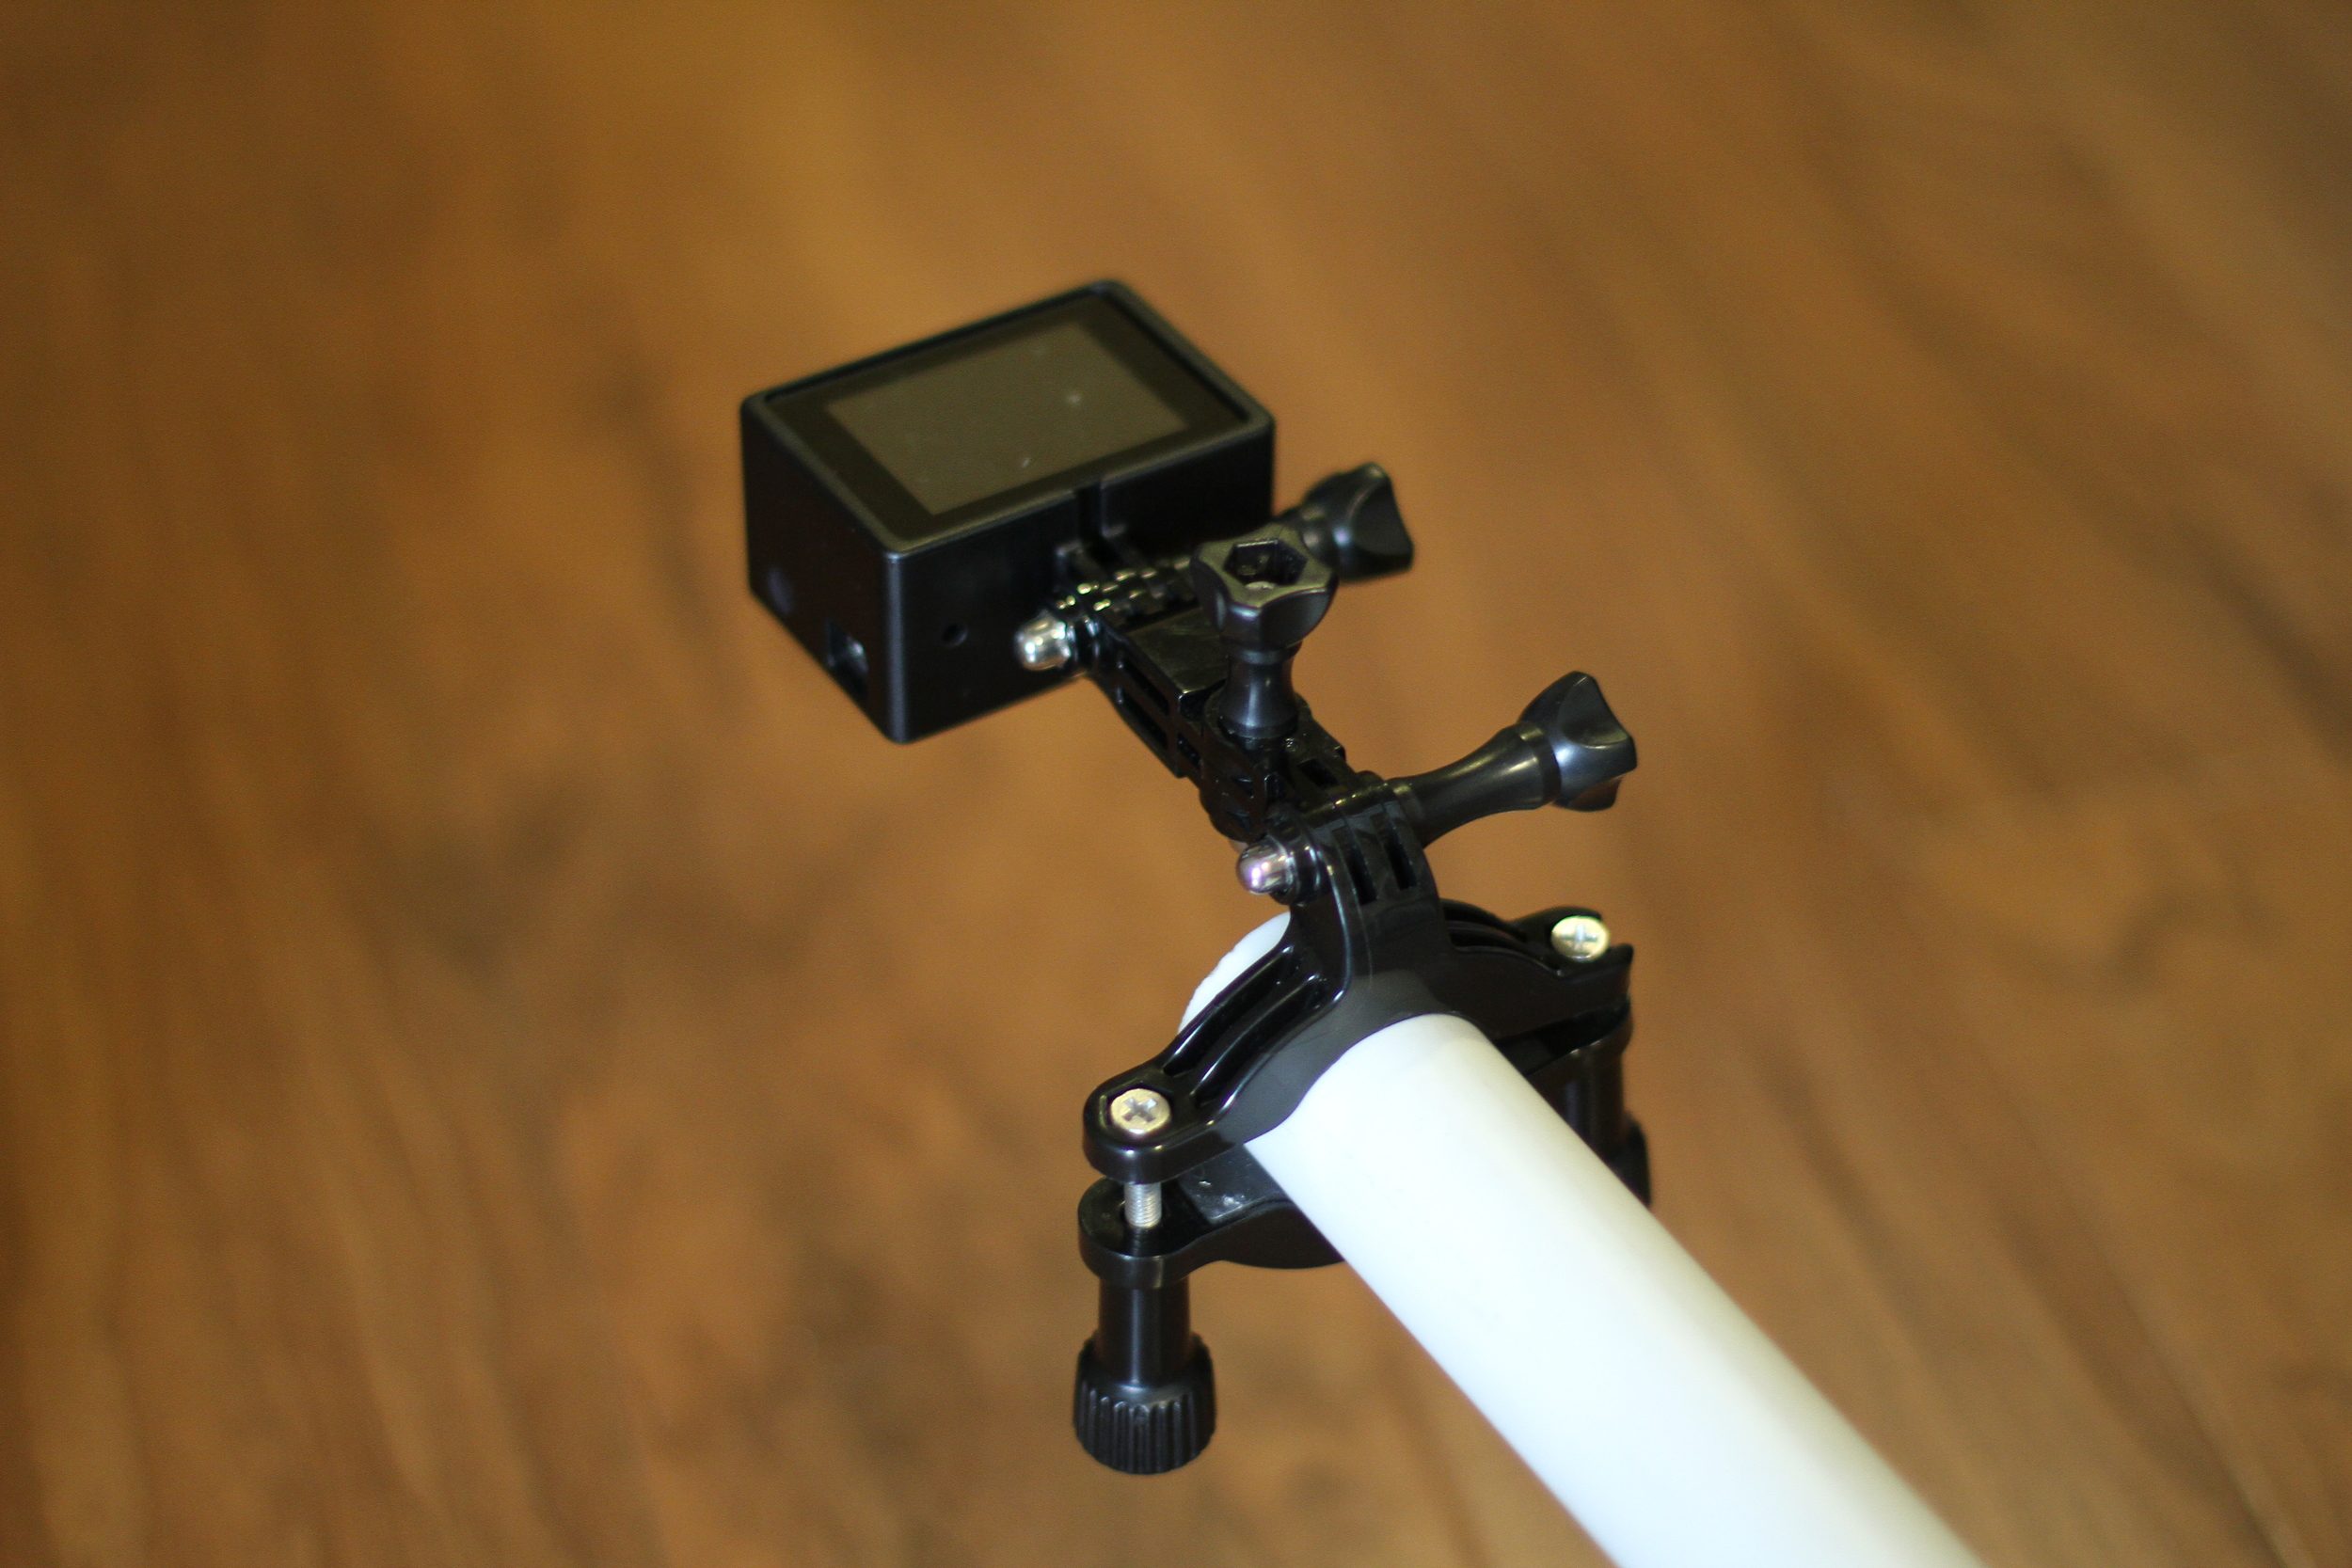
Everything was shot on a HERO4 Black, with an LCD Touch BacPac, which was attached to the end of the PVC using a roll bar mount.
Image 3/3
Part II Getting the shots
The GoPro HERO4 is a sophisticated camera with a number of shooting modes and camera settings. It is critical that you are always shooting in the mode that best suits each circumstance. Part of knowing what mode to shoot in is to think ahead to your post-production process and try to anticipate any obstacles early.
I knew the likelihood was low that each of my shots were going to line up perfectly with one another, and therefore would require a bit of resizing and adjusting. To give myself the cushion to be able to play with the image, I knew I would want to shoot in a higher resolution than the timeline I would be working on. I decided to work on a 1080 timeline and shoot everything in 2.7K resolution. I would have shot in 4K, but I wanted extra frames to have the capability to slow certain shots down if needed, and when shooting in 4K, the HERO4 is currently limited to 30fps (frames per second). So therefore I decided to shoot at 48fps (currently the highest frame rate in 2.7K) and work on a 24fps timeline, giving me the ability to slow my shots to 50% speed. The last thing I knew I would want is a flatter image with less fisheye so that as my transitions moved through the frame, they wouldn't be bending on either side of the frame. So I decided that Medium would be my go-to setting unless the circumstance called for something else. *Shooting in Medium crops your image, removing some of the fisheye, but also making your field of view narrower. Be sure to frame your shots beforehand to make sure your subject is correctly framed.
In order to create the transitions seen in the piece, every shot had to have an in and an out, meaning that the camera had to cross some sort of straight line twice during the duration of the shot, and each line had to begin and end completely out of the frame. The more dynamic shots where ones where the "line" was created by a drastic spacial change and change in texture.
Before going out, I practiced getting the fluid motion down in my backyard. After reviewing the initial footage, I realized how much bounce the camera was picking up from the flex of the PVC.
The biggest limitation that I faced on production was my ability to hold the rig steady while focusing on getting a smooth and consistent swing on the arm. This was definitely a two-person job and I learned that quickly. The easiest shots to get were the ones facing down, where I could stick a knee on the bottom portion of the rig and use both hands to focus on getting the shot. The most difficult shots were the vertical ones that required holding the entire rig up against a wall while spinning the arm. The strain of holding the heavy rig upright caused some shakiness and inconsistency in arm-swing speed. Again, having a second person to hold the rig so that I could focus on the shot would have made a world of difference.
Check out the ProjectGoPro ebook for comprehensive tutorials on how to use your GoPro camera.
Part III Stitching it together
The post-production process on this project was not as labor-intensive as I anticipated, but it did involve a lot of trail and error. The biggest challenge was figuring out which shots worked best together. Ideally the texture at the end of a given shot would have similar properties (color, exposure, etc) to the texture of the following shot. The edit quickly became a giant puzzle and it was then a matter of finding the best "home" for each shot. Unfortunately, the order of shots was therefore, to an extent, pre-determined. This is something that I wish I had thought of beforehand so that I wasn't constrained as to where I could place each shot; ideally you make that decision based on how to best communicate the story, rather than what looks best.
The way that I started piecing everything together was to take a shot that I knew I wanted to use, take the rigid line in the "outro" (when the foreground came back through the frame), and mask out everything appearing after that line.
Image 1/4 Manipulating the mask frame by frame for every shot is very important - insuring the precision of the mask.
Image 2/4 Due to the wide angle lens, the line that I was tracing would often times bend on either side of the frame. I shot almost everything in 2.7K Medium in order to reduce this effect as much as possible.
Image 3/4 Once I finished the mask, I would bring the cursor back to about halfway through the mask, revealing enough of the shot that I could test out the compatibility of a number of new shots as potential matches for a stitch.
Image 4/4 The first few shots in the piece are good examples of very similar textures working well together. In my opinion, the opening 3 shots are the most seamless. Not coincidentally they were shot in the same location, same time of day, in the exact same settings.
I stitched together all of the shots that I wanted to use with no regard to timing or music, simply just so that I didn't get overwhelmed with trying to do too much at once. When I had the stringout built in After Effects, I brought the entire thing into Premiere and laid it over the track I had picked out. Then I used the time-remapping tool to adjust the speed of the shots so that the transitions hit to the beat of the music.
THE BIG MISTAKE
The number one thing that I did wrong, was to not think about how I was going to do my color grading beforehand. If I had, I would have taken every shot that I thought might make it into the piece, and colored them individually before doing anything else. Typically, you always do your color grading as the last step in the process, and you do so by essentially recutting the piece back up into individual shots and coloring them. But because each transition had at least 10 frames where both shots were in the frame, there were no points where I could make cuts without resulting in coloring two shots at once. So if you are planning on creating a film using this method, the first step before you open After Effects should be to color your RAW files - very counter intuitive but it will save you a whole lot of time in the end.
FOR NEXT TIME
I plan on taking what I learned with this first film and keep experimenting with the concept. The following are some things that I plan on doing differently. Have a subject. The most interesting shots are the ones with a subject in the frame, not just a scenic shot. Bring a friend. As mentioned before, this shots are very difficult to manage with just one person. Tell a story. Because I was just playing with the concept, I was fine with just shooting scenics around town. Next time I definitely want to do more. I believe this technique could be really powerful if applied to high-action sports for example. Location scouting. I wasted a lot of time lugging that rig around town looking for spots that would work for a shot. Next time I plan on taking a day to cruise around with a camera taking stills of potential spots and having a plan of attack.


